This guide describes how you can use GR8 CRM Grails plugins to develop a simple web site with content authoring support.
1. GR8 CRM
GR8 CRM "Great Customer Relationship Management" is the name of a suite of plugins that help developers write customer relationship oriented applications using the open source web application framework Grails by Pivotal Inc.
The GR8 CRM "ecosystem" currently contains over 40 open source plugins for use with Grails. Most of them were developed as part of some kind of enterprise application managing customers, projects, tasks, documents, etc.
Each plugin contains functionality that supports a specific problem domain. For example the crm-task plugin contains functionality
for scheduling tasks to be performed by people typically displayed in to-do lists or calendars.
The crm-task plugin focuses on that specific domain and does not contain features for managing customers, projects or any other non-task related features.
Each GR8 CRM plugin was developed with this separation-of-concern philosophy. This makes it easy to develop a Grails application with just the functionality that is needed by assembling a set of GR8 CRM plugins covering they required features. No more, no less. The time is takes to develop an application can be heavily reduced by the use of pre-defined standard plugins.
Two plugins stand out from the rest by being included in almost all enterprise applications no matter what business they
were developed to support, crm-contact contains features for managing contacts/companies/addresses
and crm-content contains features for content authoring and document storage.
Almost all enterprise applications manages customers and some kind of digital content.
However there is one type of application that manages content but not necessary customers and that is a simple web site.
The crm-content plugin can be used by web content authors to publish HTML pages on a web site.
This guide describes how you can use GR8 CRM Grails plugins to develop a simple web site.
The crm-content plugin makes it possible to add HTML pages in a content repository and make the pages publicly accessible.
The crm-content plugin is "web-front" plugin. Meaning it includes functionality to publish content on a web site.
It does not include functionality for content authoring. A companion plugin crm-content-ui adds authoring support
for content creators.
Lets start from scratch and create a Grails application that when deployed to a web server will serve as a simple web site.
2. Prerequisites
As of this writing the GR8 CRM plugins are not tested with Grails versions above 2.2.4, so please make sure you have Grails 2.2.4 installed and ready before you attempt to follow this guide. Newer versions of Grails will be tested and adjustments will be done if needed to support newer versions, but because of lack of resources that work has not yet been done. If you have the knowledge you are welcome to try with newer versions of Grails but I cannot guarantee it will work.
3. Create a new Grails application
$ grails create-app mywebsite
$ cd mywebsite
In this project we want (web) content management support so we need to add the crm-content-ui plugin in BuildConfig.groovy. You must also add some other plugins needed at runtime.
-
twitter-bootstrap
-
less-resources
Your plugin section in BuildConfig.groovy should look like this:
plugins {
    build ":tomcat:$grailsVersion"
    runtime ":hibernate:$grailsVersion"

    compile ":jquery:1.10.2"
    compile ":resources:1.2.7"
    compile ":twitter-bootstrap:2.3.2"
    compile ":less-resources:1.3.3.2"

    compile ':cache:1.1.1'

    compile ":crm-security-shiro:2.0.0"
    compile ":crm-i18n:2.0.0"
    compile ":crm-content-ui:2.0.0"
}
We want our application to be a public web site, therefore we must add a few parameters to Config.groovy to support this.
crm.feature.crmContent.required = true (1)
crm.security.controllers.public = ['crmFileAccess', 'crmPageNotFound'] (2)
crm.content.cms.path = '/website/pages/' (3)| 1 | Enable the crm-content plugin for all users |
| 2 | Controllers that should be excluded from authentication so they can be accessed by anyone |
| 3 | Look for HTML pages in the /website/pages virtual folder. |
4. Start the application
Now you should be ready to start the application!
$ grails run-app

| Server running. Browse to http://localhost:8080/mywebsite
Point your browser to the application URL and you should see the familiar Grails start page.
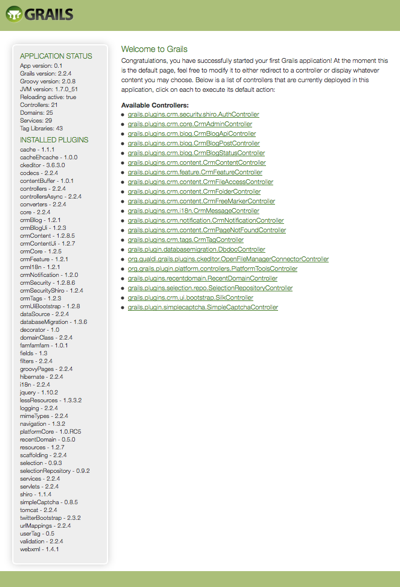
The list of installed plugins is long but that’s normal. It contains all transitive plugins pulled in by dependency resolution.
This was not very interesting. How do we publish content on the web site?
5. Load data
In order to publish content you must login as a valid application user. To do this we must load the database with some metadata like users and permissions. We must also create a folder structure to hold our web content.
Add this to BootStrap.groovy:
class BootStrap {

    def navigationService
    def crmAccountService
    def crmSecurityService
    def crmContentService

    def init = { servletContext ->

        navigationService.registerItem('main',
            [controller: 'crmFolder', action: 'list', title: 'crmContent.index.label', order: 20]) (1)
        navigationService.updated()

        def admin = crmSecurityService.createUser([username: "admin", password: "admin",
            email: "firstname.lastname@email.com", name: "Site Admin", enabled: true]) (2)

        crmSecurityService.addPermissionAlias("permission.all", ["*:*"])

        crmSecurityService.runAs(admin.username) {
            def account = crmAccountService.createAccount([status: "active"], [:]) (3)
            def tenant = crmSecurityService.createTenant(account, "Website") (4)
            crmSecurityService.runAs(admin.username, tenant.id) {
                crmSecurityService.addPermissionToUser("permission.all")

                def root = crmContentService.createFolder(null, "website", "Web site content", "", "") (5)
                def images = crmContentService.createFolder(root, "images", "Web site images", "", "")
                def pages = crmContentService.createFolder(root, "pages", "Web pages", "", "")
            }
        }
}| 1 | Add a navigation item for content authoring to the main menu |
| 2 | Create the admin user |
| 3 | Create an account to hold our tenants |
| 4 | Create a tenant were we will store all information |
| 5 | Create a folder structure to hold all our web content |
|
Multitenancy refers to a principle in software architecture where a single instance of the software runs on a server, serving multiple client-organizations (tenants). Multitenancy contrasts with multi-instance architectures where separate software instances (or hardware systems) operate on behalf of different client organizations. With a multitenant architecture, a software application is designed to virtually partition its data and configuration, and each client organization works with a customized virtual application. [Multitenancy] All GR8 CRM plugins are required to support multitenancy. There are no automatic filtering going on behind the scenes by |
Now restart the application and browse to http://localhost:8080/mywebsite again.
On the Grails start page click on grails.plugins.crm.content.CrmFolderController in the Available Controllers section.
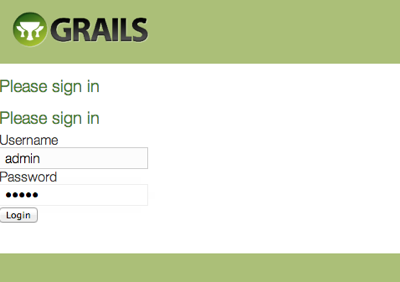
You will now be forced to login using the username and password you specified in BootStrap.groovy (admin/admin).
It’s the crm-security-shiro plugin that kicks in and protects controller access using Apache Shiro.
When successfully logged in you will see a page where you can search for files and folders.
Click the Find button and you will see a list of folders.
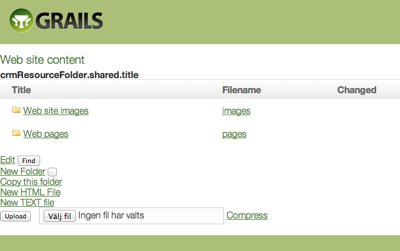
6. Twitter Bootstrap design
However there is something wrong with the user interface and design. The user interface cannot be meant to be this ugly?!
No the user interface can be better looking. We have to add some twitter bootstrap configuration to ApplicationResources.groovy
and remove the layout that was copied to grails-app/views/layouts folder by grails create-app.
Edit grails-app/conf/ApplicationResources.groovy and make it look like this:
modules = {
    'bootstrap-responsive-less' {
        dependsOn 'bootstrap'
        resource id:'bootstrap-responsive-less', url:[plugin: 'twitter-bootstrap', dir: 'less', file: 'responsive.less'], attrs:[rel: "stylesheet/less", type:'css', order:150], disposition: 'head'
    }
    application {
        dependsOn 'bootstrap-responsive-less'
        resource url:[plugin: 'twitter-bootstrap', dir: 'less', file: 'bootstrap.less'], attrs:[rel: "stylesheet/less", type:'css', order:10], disposition: 'head'
        resource url:'js/application.js'
    }
}
Remove the default layout.
rm grails-app/views/layouts.main.gsp
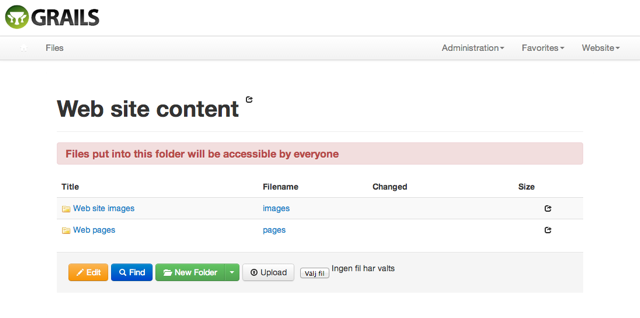
Now refresh the browser and you should see a design based on Twitter Bootstrap.
7. URL mapping for HTML pages
The crm-content plugin supports publishing HTML documents to a web site but this functionality is not enabled by default.
To enable website mode we must add one line in grails-app/conf/UrlMappings.groovy
"404"(controller: "crmPageNotFound", action: "index")The above configuration routes 404 (page not found) errors to a special Grails controller that looks up and renders HTML pages.
8. Create an HTML page
Now click on the folder Web pages to move into this folder, then click the New HTML file button.
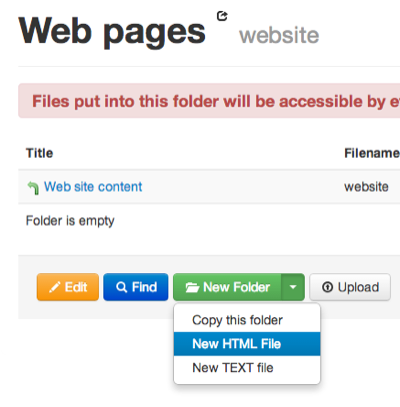
A Rich Text Editor is opened where you can create you web page without the need to know HTML.
Write some meaningful text and save the page as index.html.

Now you are ready to access your first web page!
Type the application URL followed by index.html into your browser address bar and your carefully crafted page should appear.
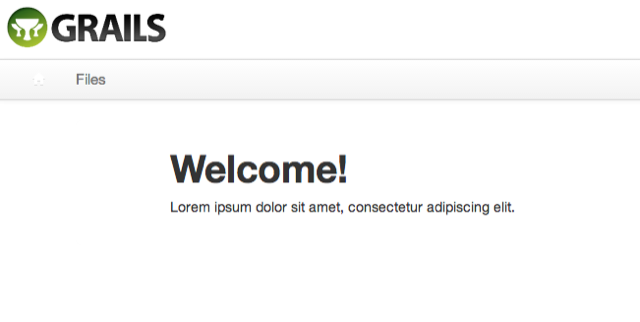
9. Web Layout
Where does the header come from? The Grails logo and the horizontal menu?
In a previous step we removed the layout grails-app/views/layouts.main.gsp, so where does it pickup the Twitter Bootstrap layout?
The user interface plugin crm-ui-bootstrap contains a layout called main.gsp. That’s what you see in your browser.
This layout is specifically made to support the back-office user role, like content creators and administrators.
It’s not made for public facing web sites. So we must create a new layout for our web content.
Create a file called grails-app/views/layouts/web.gsp and add the following markup:
<!DOCTYPE html>
<html lang="en" class="no-js">
<head>
    <meta http-equiv="Content-Type" content="text/html; charset=UTF-8"/>
    <title><g:layoutTitle default="My GR8 Web"/></title>
    <r:require modules="application, crm"/>
    <r:layoutResources/>
    <g:layoutHead/>
</head>
<body>
    <div class="container">
        <g:layoutBody/>
    </div>
    <r:layoutResources/>
</body>
</html>
We must tell the crm-content plugin to use this new layout for web content.
Edit Config.groovy and change crm.content.cms.layout to web.
crm.content.cms.layout = 'web'
We have to restart the application for changes to take effect, but that will destroy our manually crafted web page index.html.
To avoid repeated manual work we can add code to BootStrap.groovy to programatically create index.html when the application starts.
Add this code after the code that creates the folder pages in BootStrap.groovy.
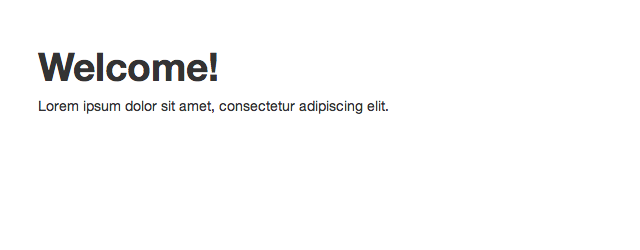
crmContentService.createResource("""
<h1>Welcome!</h1>
<p>Lorem ipsum dolor sit amet, consectetur adipiscing elit.</p>
""", "index.html", pages)
Now refresh the browser and you should see the contents of index.html without any layout around it.
There is one annoying problem left. If you access the application URL http://localhost:8080/mywebsite (without index.html) you’ll get the default Grails welcome page.
We want index.html to be displayed when users navigate to the default URL. This can be done by changing a line in grails-app/conf/UrlMappings.groovy.
The "/" URI is by default mapped to the index view. This will display grails-app/views/index.gsp in the browser.
If we add a .html extension to the view it will show our index.html page instead.
"/"(view:"/index.html")
Point your browser to http://localhost:8080/mywebsite and it should display our index.html page.
The default Grails index.gsp will not be accessible anymore because it’s "hidden" by the URL mapping.
If you want a clean project you can delete grails-app/views/index.gsp now.
10. Custom stylesheet
Up until now our layout has been using the default stylesheets from the twitter-bootstrap Grails plugin, but we want to put
a little personal style to our website by changing some colors and styles. To do this we must copy the default styles and modify them.
Create a folder under your application’s web-app folder called less. Then locate the twitter-bootstrap plugin that your application uses.
If you use IntelliJ IDEA you can access it in the Project Explorer under the Plugins/twitter-bootstrap-2.3.2 folder.
If you’re not using IntelliJ you can find the plugins in $HOME/.grails/…/plugins.
Another option is to copy the file from it’s source https://github.com/twbs/bootstrap/blob/v2.3.2/less/variables.less
Copy the file variables.less from the twitter-bootstrap distribution and put it in the less folder under your application’s web-app folder.
Then create an empty file under your application’s web-app/less folder called application.less with this content:
@import "responsive.less";
// Add your CSS changes and additions here...
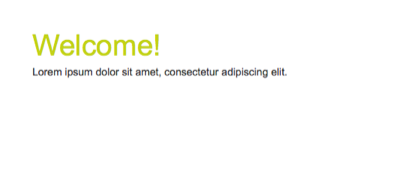
h1 {
color: @green;
}You should now have two files in your application’s web-app/less folder:
application.less
variables.less
To make the application use our custom styles we must edit grails-app/conf/ApplicationResources.groovy and change the
application module. We must remove the plugin key and change file value from bootstrap.less to application.less.
application {
    dependsOn 'bootstrap-responsive-less'
    resource url:[dir: 'less', file: 'application.less'], attrs:[rel: "stylesheet/less", type:'css', order:10], disposition: 'head'
    resource url:'js/application.js'
}
Restart the application and refresh the start page, the header text (h1) should now be green.
You can add your custom styles and override existing styles in application.less.
You can refer to [LESS] variables located in variables.less like @blue, @linkColor and @navbarHeight.
11. Import HTML pages from files
The index.html file was added programatically in BootStrap.groovy. That’s easy for testing and to get a page up and running quickly.
But adding HTML pages as Groovy code is not the smartest thing to do. There is another option built into the crm-content plugin.
We can have it import HTML files (or any other content) from the file system when the application starts.
Edit BootStrap.groovy and add the crmContentImportService bean.
class BootStrap {
    ...
    def crmContentImportService
}
Then remove the statement crmContentService.createResource(…) and replace it with this line:
crmContentImportService.importFiles("templates/crm", "admin")
This will import all files under src/templates/crm as web resources.
Under this folder your can put HTML pages, images, PDF:s or any other file type you want to use on your web site.
Create two new folders under src/templates/crm/website:
images
pages
Then put a file called index.html in the …/website/pages folder with the same content as before:
<h1>Welcome!</h1>
<p>Lorem ipsum dolor sit amet, consectetur adipiscing elit.</p>
This file will now be imported when the application starts. The end result is exactly the same as with the createResource(…) code that we had before in BootStrap.groovy.
You can add all your HTML pages in pages and images in images. You refer to images with the following path:
<img src="/mywebsite/r/1/website/images/imagename.png/>
The r prefix is for resources and number 1 is the ID of our tenant where we store all data.
This concludes our first part of this guide. We now have a Grails application that can serve as a public facing web site. It has built-in content editing features, including image uploads. You can add HTML pages and images in src/templates/crm/website that will be imported when the application starts. Or you can configure a persistent database in DataSource.groovy and start creating pages manually in the rich text editor.
12. Source
A sample application that was created by following this tutorial can be found at https://github.com/gr8crm/gr8crm-web